CLI Reference
The command line interface of Line Track Designer is available for Linux, macOS and Windows. It uses Click. To check if you successfully installed the library, you can entry in a command prompt:
linetrack --help
You will see the following content:
Usage: linetrack [OPTIONS] COMMAND [ARGS]...

Generate line following tracks for robots.

Options:
-v, --verbosity  Set the verbosity
--help           Show this message and exit.

Commands:
addcol    Add a column to track FILENAME.
addrow    Add a row to track FILENAME.
create    Create empty track FILENAME.
delcol    Delete column COL from track FILENAME.
delrow    Delete row ROW from track FILENAME.
doc       Open the documentation.
edit      Edit track FILENAME.
pdf       Open the PDF file containing the tiles.
printing  Print track FILENAME.
rotate    Rotate track FILENAME.
savemd    Save track FILENAME as MD file.
savepng   Save track FILENAME as PNG file.
show      Show track FILENAME as PNG file.
showtile  Show tile NUMBER.
write     Write track FILENAME in the command prompt.
It is the help menu of the CLI. You can see all the commands you can use.
You can open the documentation using this command:
linetrack doc [OPTIONS]
Creating a track
To create a track, you can use the create command:
linetrack create [OPTIONS] FILENAME NROW NCOL
FILENAME must be a text file. You need to indicate the number of rows and columns of the track. It creates a track with only blank tiles and open it so that you can edit it.
For example:
linetrack create track.txt 3 4
This command creates the file track.txt and open it with this content:
0;0 0;0 0;0 0;0
0;0 0;0 0;0 0;0
0;0 0;0 0;0 0;0
Editing a track
The edit command is usefull to open a track with your default text editor and modify it.
linetrack edit [OPTIONS] FILENAME
The file must be a text file corresponding to a track.
Moreover, you can use different commands to modify the track:
addcolandaddrow: add a column/row to a track
linetrack addcol [OPTIONS] FILENAME
linetrack addrow [OPTIONS] FILENAME
delcolanddelrow: delete a column/row from a track
linetrack delcol [OPTIONS] FILENAME COL
linetrack delrow [OPTIONS] FILENAME ROW
COL/ROW is the number of the column/row to delete.
rotate: rotate a track
linetrack rotate [OPTIONS] FILENAME
The number of rotations can be indicated using the -n option.
Showing a track
You can display a track in two different ways:
writing it in the command prompt using the
writecommand
linetrack write [OPTIONS] FILENAME
showing it in your picture viewer using the
showcommand
linetrack show [OPTIONS] FILENAME
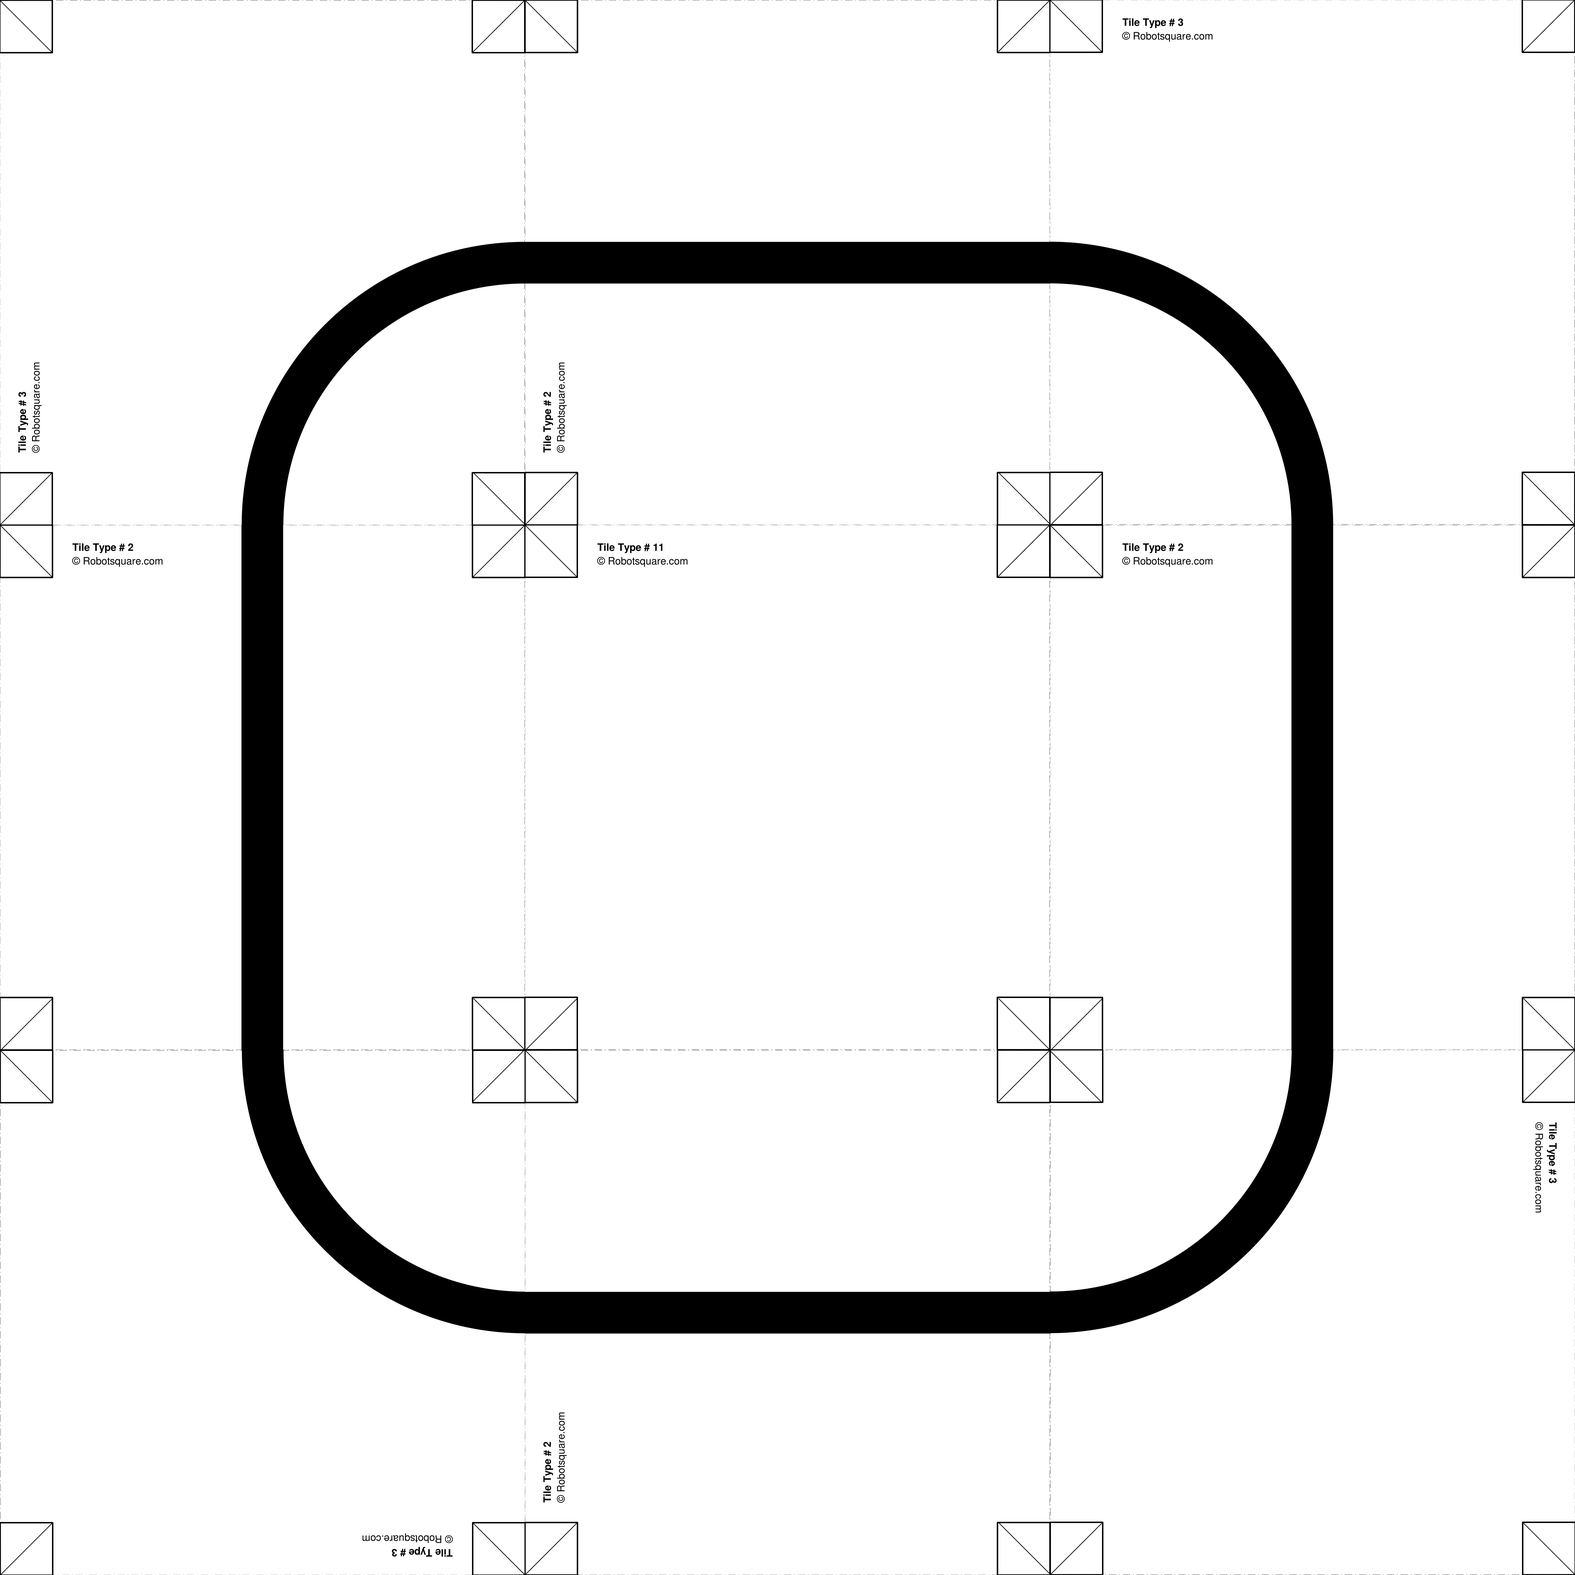
For example, we consider the track.txt file with this content:
3;1 2;1 3;0
2;0 11;0 2;0
3;2 2;1 3;3
The first command will display its content in the command prompt:
linetrack write track.txt
With the second command,
linetrack show track.txt
We can see this PNG image:
Exporting a track
Once your track is finished, you can export it to easily share it.
First, you can generate and save the PNG file associated to your track using the savepng command:
linetrack savepng [OPTIONS] FILENAME
You can specify the name of the output PNG file using the -o or --output option. You can also
open the PNG file using the -s or --show command.
For example:
linetrack savepng -o track_image.png track.txt
Then, you can create a markdown file to generate a little documentation about your track.
To do that, you can use the savemd command:
linetrack savemd [OPTIONS] FILENAME
The following options are available:
-o, --output TEXT       Name of the MD file
-n, --name TEXT         Name of the track
-d, --description TEXT  Description of the track
The markdown file generated can be exported into PDF and HTML.
You can see an example of a PDF file generated by this command here:
track.pdf
Note
The savemd command will also generate the PNG file in the same folder than the markdown file.
Printing a track
Warning
This command can be used only on Linux and macOS.
Once your track is finished, you can print it in A4 format (or US letter paper)
with your printer using the printing command:
linetrack printing [OPTIONS] FILENAME
Showing the tiles
You can see the tiles available using two commands:
showtile: show a tile corresponding to the number given
linetrack showtile [OPTIONS] NUMBER
This command will open the PNG file corresponding to the tile in your picture viewer.
You can indicate the orientation using the -o or --orient option.
pdf: open the PDF file containing the tiles in your web browser
linetrack pdf [OPTIONS]
With this command, you can see the PDF file used by Line Track Designer and can choose the tiles you want to use in your track.
Note
On Windows, you can also use this command to open the PDF file and print the tiles you want manually.